
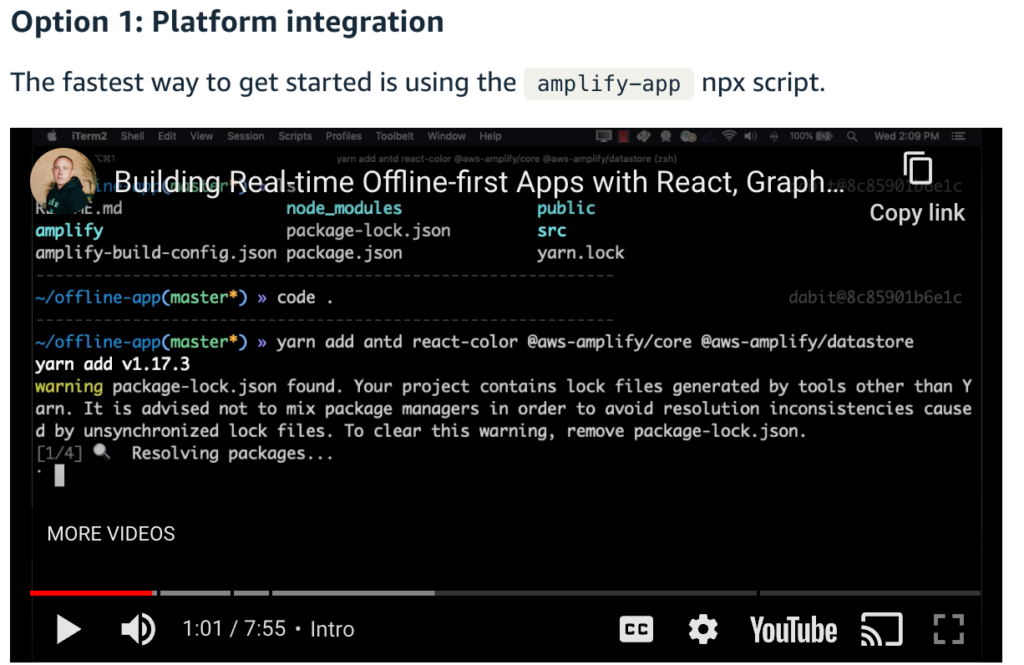
Creating An Amplify App With Persistent Data
This is my developer journal as I learn about creating an Amplify app with persistent data. The app will be built with JavaScript app with persistent data storage on AWS Amplify. I am using Webstorm as my IDE, git as my version control system. Node will be one of the main libraries with NPM as the package manager.
Local Environment
- Create a new NodeJS project in Webstorm.
- Add a folder (project) using lowercase directory names. (I named mine alpha-stocker.)
- Use the default path for node as the engine (18.2) and NPM (9.2).
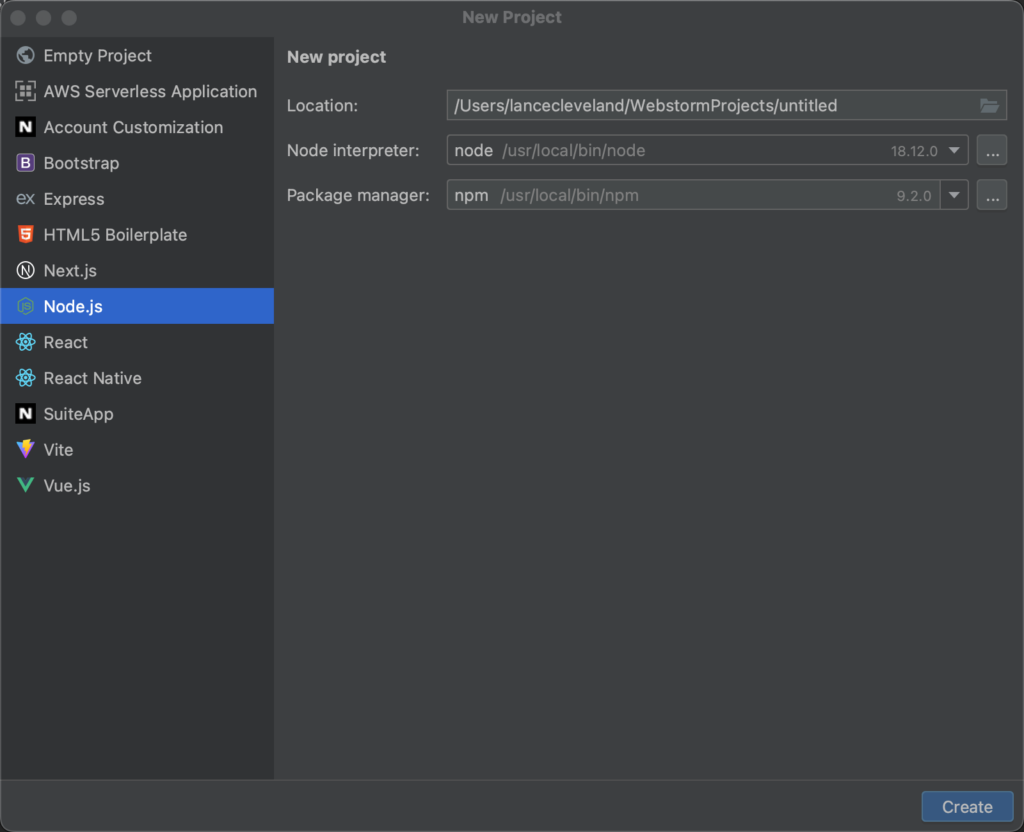
When the project opens, go to the terminal window.
Install Amplify CLI (globally) – today this command installed version 10.6.2.
npm install -g @aws-amplify/cliCreate a react app as a subcomponent that will manage the datastore. Initialize the amplify app using the node script.
npx create-react-app amplify-datastore --use-npm
cd amplify-datastore
npx amplify-app@latest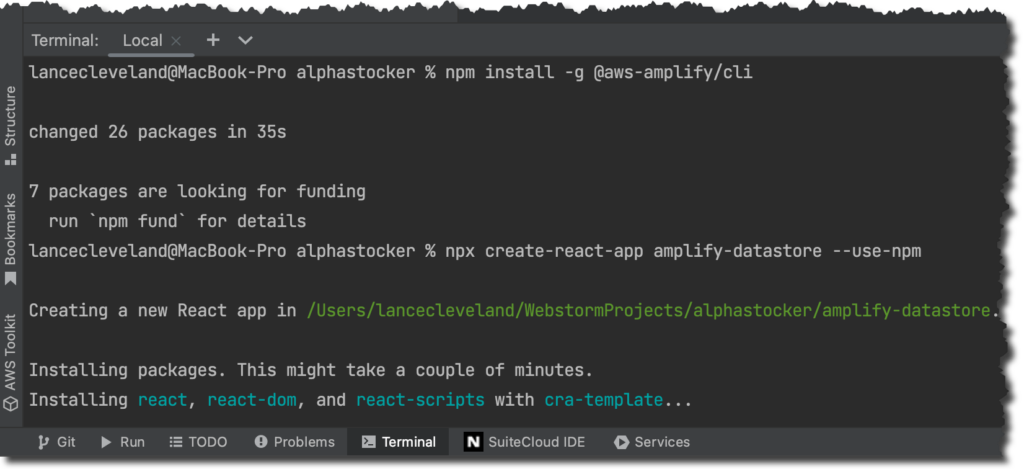
This will create a subfolder named amplify-datastore that will contain a react + amplify app.
Note: My guess is that for this stage of the app, that subdirectory will be the “entire app”; Or at least the entire first go at a persistent data storage app. It very well could be one of many microservices for a larger platform.
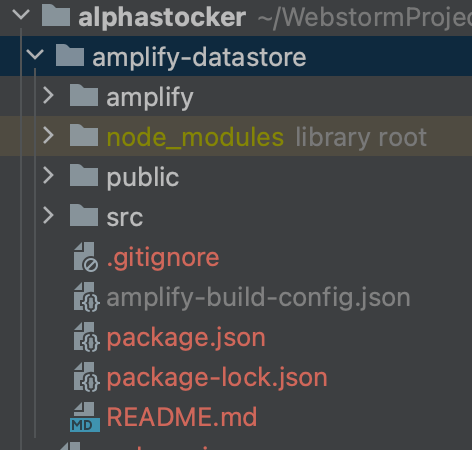
In the image below, the subdirectory is show as well as the “overall platform” package.json. This could possibly be where full platform deployments or cross-service “glue” would live. I anticipate this will be largely unused for now.

You can see amplify-datastore has an entire Node app within from the following screen capture.
Related Amplify CLI Datastore commands suggested on install include:
Some next steps:
"npm run amplify-modelgen" will allow you to generate models/entities for your GraphQL models
"npm run amplify-push" will build all your local backend resources and provision them in the cloud
Defining The Data Model
Running the above commands provides a temporary data model that can be used to do a test run on the Amplify Datastore service.
The model definition is in the amplify-datastore/amplify/backend/api/amplifyDatasource folder in a file named schema.graphql.
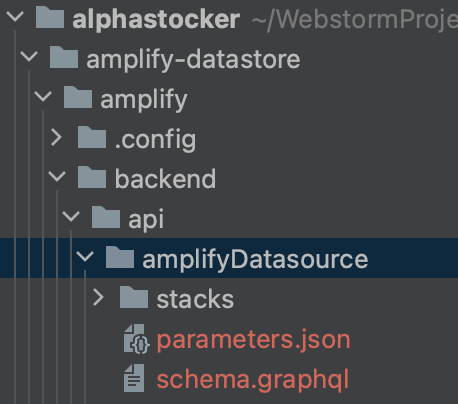
The template GraphQL data schema that is provided looks like this:
type Task @model {
  id: ID!
  title: String!
  description: String
  status: String
}
type Note @model {
  id: ID!
  content: String!
}
Revise it to look like this:
type Message @model {
    id: ID!
    title: String!
    color: String
    createdAt: String
}
Building The Model
If you follow the Amazon Getting Started guide you’ll note they suddenly change to Yarn for node management and get Ant Design involved as their preferred UX framework for the React app.
Tim to install some supporting Node libraries and frameworks. Let’s do that and run the model generator.
npm install antd react-color @aws-amplify/core @aws-amplify/datastore
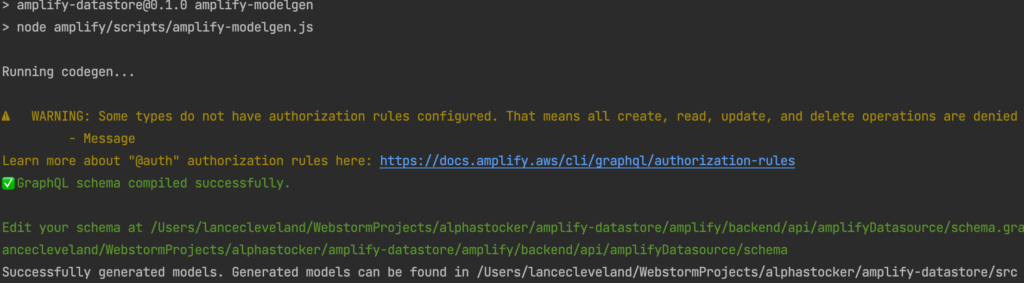
npm run amplify-modelgenThis threw out some interesting warnings we may have to deal with later:
> amplify-datastore@0.1.0 amplify-modelgen
> node amplify/scripts/amplify-modelgen.js

Running codegen...

⚠️  WARNING: Some types do not have authorization rules configured. That means all create, read, update, and delete operations are denied on these types:
         - Task
         - Note
Learn more about "@auth" authorization rules here: https://docs.amplify.aws/cli/graphql/authorization-rules


✅ GraphQL schema compiled successfully.

Edit your schema at /Users/lancecleveland/WebstormProjects/alphastocker/amplify-datastore/amplify/backend/api/amplifyDatasource/schema.graphql or place .graphql files in a directory at /Users/lancecleveland/WebstormProjects/alphastocker/amplify-datastore/amplify/backend/api/amplifyDatasource/schema

Successfully generated models. Generated models can be found in /Users/lancecleveland/WebstormProjects/alphastocker/amplify-datastore/src
This will create a models directory in the source directory at amplify-datastore/src/models.
We will also end up with a modified amplify-datastore/package.json with the new libs:
{
    "name": "amplify-datastore",
    "version": "0.1.0",
    "private": true,
    "dependencies": {
        "@aws-amplify/core": "^5.0.11",
        "@aws-amplify/datastore": "^4.0.11",
        "@testing-library/jest-dom": "^5.16.5",
        "@testing-library/react": "^13.4.0",
        "@testing-library/user-event": "^13.5.0",
        "antd": "^5.1.6",
        "react": "^18.2.0",
        "react-color": "^2.19.3",
        "react-dom": "^18.2.0",
        "react-scripts": "5.0.1",
        "web-vitals": "^2.1.4"
    },
    "scripts": {
        "start": "react-scripts start",
        "build": "react-scripts build",
        "test": "react-scripts test",
        "eject": "react-scripts eject",
        "amplify-modelgen": "node amplify/scripts/amplify-modelgen.js",
        "amplify-push": "node amplify/scripts/amplify-push.js"
    },
    "eslintConfig": {
        "extends": [
            "react-app",
            "react-app/jest"
        ]
    },
    "browserslist": {
        "production": [
            ">0.2%",
            "not dead",
            "not op_mini all"
        ],
        "development": [
            "last 1 chrome version",
            "last 1 firefox version",
            "last 1 safari version"
        ]
    },
    "devDependencies": {
        "ini": "^1.3.5",
        "inquirer": "^6.5.1"
    }
}
Push Amplify App To The Cloud
Run amplify init and amplify push.
amplify init
... answer prompts (see below)
amplify push
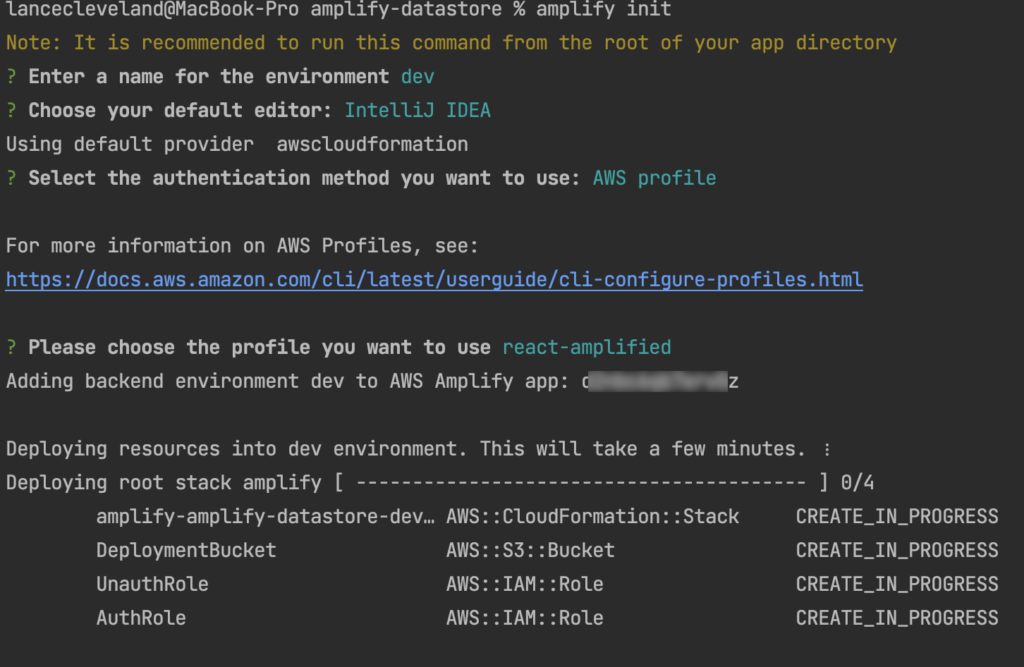
... answer prompts (see below)Amplify Init Prompts
On the first go select…
- Environment : dev (default)
- Editor: IntelliJ IDEA
- Auth mode: AWS Profile
- Which Profile: aws-amplified (one I had from a prior project, can choose default)
Some suggested commands:
Your project has been successfully initialized and connected to the cloud!
Some next steps:
"amplify status"
will show you what you've added already and if it's locally configured or deployed
"amplify add <category>"
will allow you to add features like user login or a backend API
"amplify push"
will build all your local backend resources and provision it in the cloud
"amplify console"
to open the Amplify Console and view your project status
"amplify publish"
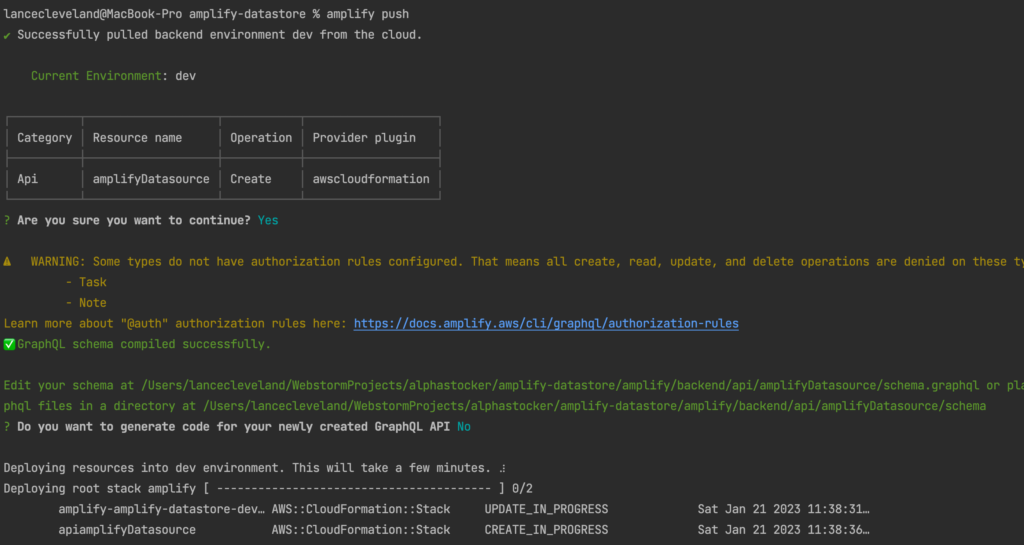
will build all your local backend and frontend resources (if you have hosting category added) and provision it in the cloudAmplify Push Prompts
- Continue? Y
- Generate GraphQL Code? N
Per video: “Since we are using the DataStore API, choose no”
Updating The React App Template Code
Before starting this step, I initialized a local git repo and committed the current state of the app to a repo. This gives us a good baseline to rewind to without having to start over.
Now we need to connect the AWS Amplify Datastore to the skeleton React App. Time to edit some code.
The React App starts here: amplify-datastore/src/index.js
This is where the video is starting to show it’s age. Some of the distribution elements in Ant Design are missing. Here is what was added locally to the index.js just below the pre-existing imports.
import {Amplify} from "@aws-amplify/core";
import config from './aws-exports';
Amplify.configure(config);
The current index.js at this stage:
import React from 'react';
import ReactDOM from 'react-dom/client';
import './index.css';
import App from './App';

import {Amplify} from "@aws-amplify/core";
import config from './aws-exports';
Amplify.configure(config);

const root = ReactDOM.createRoot(document.getElementById('root'));
root.render(
  <React.StrictMode>
    <App />
  </React.StrictMode>
);
Following the video, we will overwrite the main App.js — however this app in the video is designed for a simple messaging data model that was neglected earlier in the setup process. We will have to go back and fix that.
Here is the new app code for amplify-datastore/src/App.js
import React, {useState, useEffect} from 'react'
import {SketchPicker} from "react-color"
import {Input, Button} from "antd"
import {DataStore} from "@aws-amplify/datastore"
import {Message} from './models';

const initialState = { color: '#000000', title: '' };

function App() {
    const [formState, updateFormState] = useState(initialState)
    const [messages, updateMessage] = useState([])
    const [showPicker, updateShowPicker] = useState(false)

    useEffect(() => {
        fetchMessages()
        const subscription = DataStore.observe(Message).subscribe(()=>fetchMessages())
        return () => subscription.unsubscribe();
    });

    function onChange(e) {
        if (e.hex) {
            updateFormState({ ...formState, color: e.hex})
        } else {
            updateFormState({ ...formState, title: e.target.value})
        }
    }

    async function fetchMessages() {
        const messages = await DataStore.query(Message)
        updateMessage(messages)
    }

    async function createMessage() {
        if (!formState.title) return
        await DataStore.save(new Message({...formState}))
        updateFormState(initialState)
    }

    return (
        <div style={container}>
            <h1 style={heading}>Messages</h1>
            <Input
                onChange={onChange}
                name='title'
                placeholder='Messsage title'
                value={formState.title}
                style={input}
                />
            <div>
                <Button
                    onClick={() => updateShowPicker(!showPicker)}
                    style={button}>Toggle Picker</Button>
                <p>Color: <span style={{fontWeight: 'bold', color: formState.color}}>{formState.color}</span></p>
            </div>
            {
                showPicker && <SketchPicker color={formState.color} onChange={onChange} />
            }
            <Button type='primary' onClick={createMessage}>Create Message</Button>
            {
                messages.map(message => (
                    <div key={message.id} style={{...messageStyle, backgroundColor: message.color}}>
                        <div style={messageBg}>
                            <p style={messageTitle}>{message.title}</p>
                        </div>
                    </div>
                ))
            }
        </div>
    );
}

const container = { width: '100%', padding: 40, maxWidth: 900 }
const input = { marginBottom: 10 }
const button = { marginBottom: 10 }
const heading = { fontWeight: 'normal', fontSize: 40 }
const messageBg = { backgroundColor: 'white' }
const messageStyle = { padding: '20px', marginTop: 7, borderRadius: 4}
const messageTitle = { margin: 0 , padding: 9, fontSize: 20 }

export default App
Slight Data Model Clean Up Here…
Above where I have “Revise the model here”, if you did that in order you’ll be good to start the app. I skipped that step and now have to go fix it. I revised the schema.graphql file to replace the ToDo list example with the message example used in the video.
I edited the file and hope to rebuild with a model gen command that fixes everything. Let’s see how good these Datastore and Amplify CLI tools are…
npm run amplify-modelgen
amplify push
Maybe we needed to run amplify init again? I’m hoping the first time that the models and services were invoked, so amplify push will send the new model and DataStore will know how to version it and replace the ToDo with the Message model.
The model gen worked and the push looked promising, but alas no… it broke. It did indicate it needed to remove the old ToDo model tables, but clearly it did not like deleting all the tables and putting in a new one:
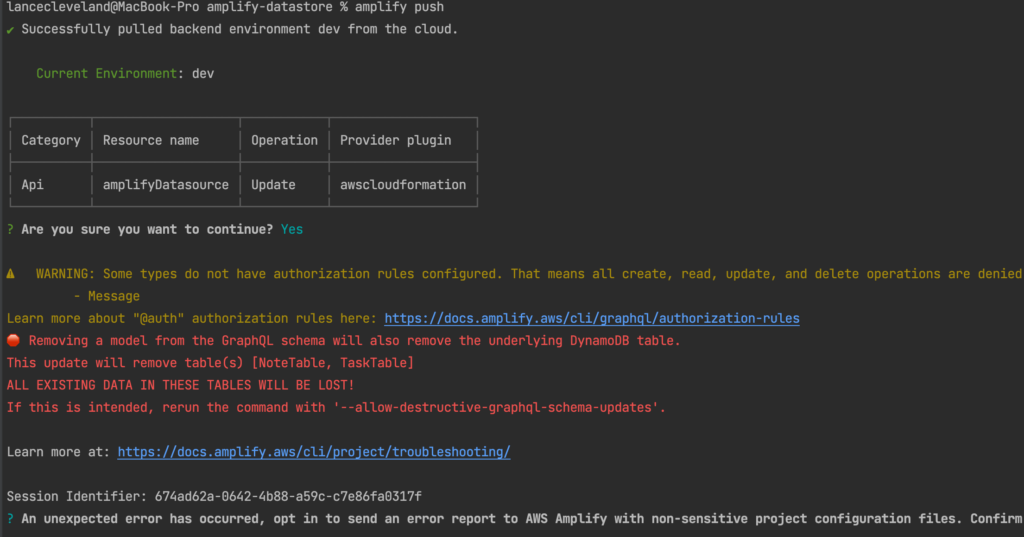
amplify push --allow-destructive-graphql-schema-updates Run The App
Execute npm start to run the app:
npm startYou should see a rudimentary web app come up:
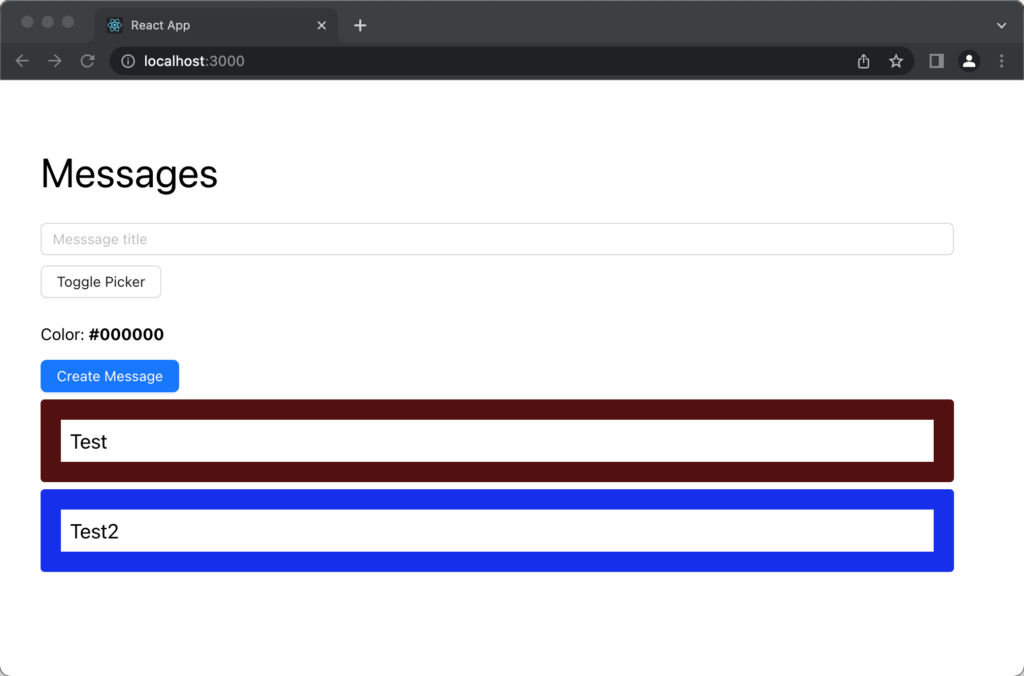
No Data Listener
Now opening the browser in two separate windows, like shown in the demo video, should populate the message list in the new browser window. Alas this does not happen. Something is up in our initial app.
The demo video shows and import of ./serviceWorker in the main index.js. While this is a listener of some sort, it is NOT present in the current version of the Amplify tools.
Checking the AWS Amplify console it looks like no data is actually being synced/sent to the cloud.
Attempted Fix #1
Let’s see if we can get this talking to DynamoDB on the cloud. I can see the data object and structure on AWS but no content.
amplify env add
amplify api update
npm start
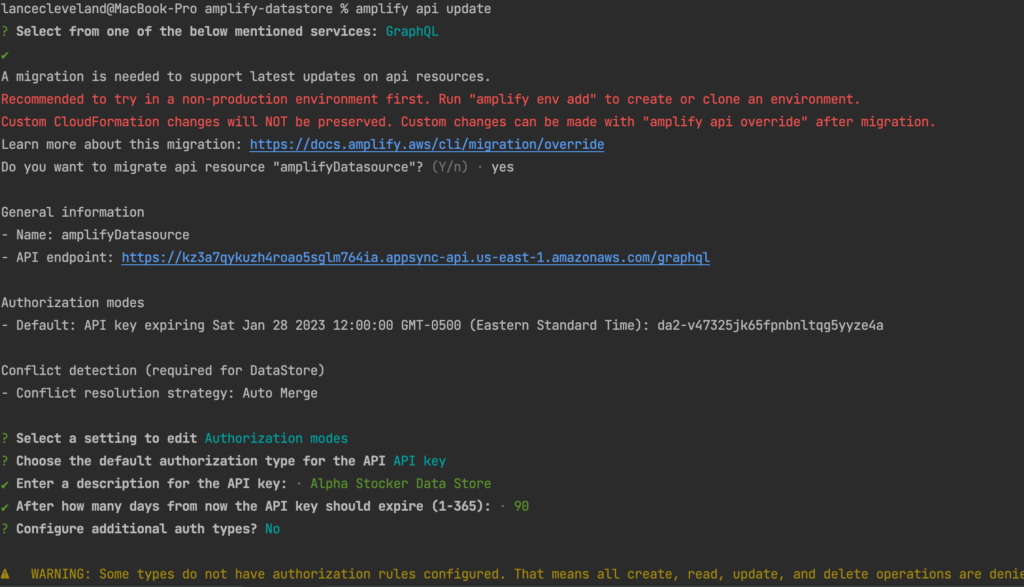
No change.
Attempted Fix #2
Maybe the user credential I chose (not default) is breaking things. The next fix attempt from hints over at AppSync …
amplify add codegen --apiId 7ed66z6fkfhallyiwzwctbcryy This barfed out the following error:
User: arn:aws:iam::744590032041:user/amplify-react-amplified is not authorized to perform: appsync:GetGraphqlApi on resource: arn:aws:appsync:us-east-1:744590032041:apis/7ed66z6fkfhallyiwzwctbcryy
To fix this permission error – go to IAM on AWS and create a new security group “react-amplify-apps”. Assign the aws-amplify user to the new group.
In that group add the following policies:
AWSAppSyncAdministrator (this one finally allowed access)

These may have helped but need to be "dialed down" most likely:
AdministratorAccess-Amplify
AmazonDynamoDBFullAccess
AWSAppSyncInvokeFullAccess
Re-run the codegen above and we get a bunch of new code added to our app:
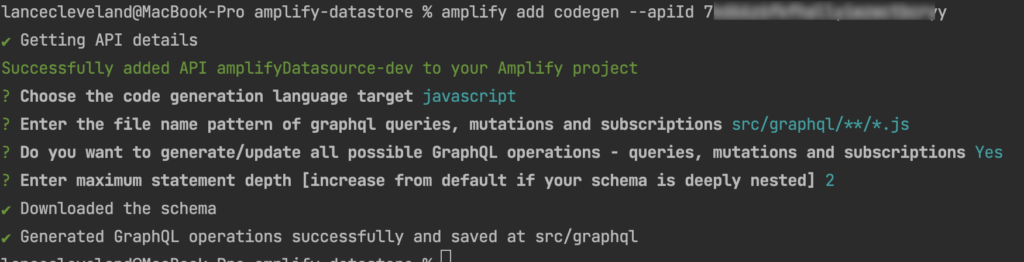
And now we have the GraphQL source subdir shown in many Amplify examples at amplify-datastore/src/graphql/queries.js
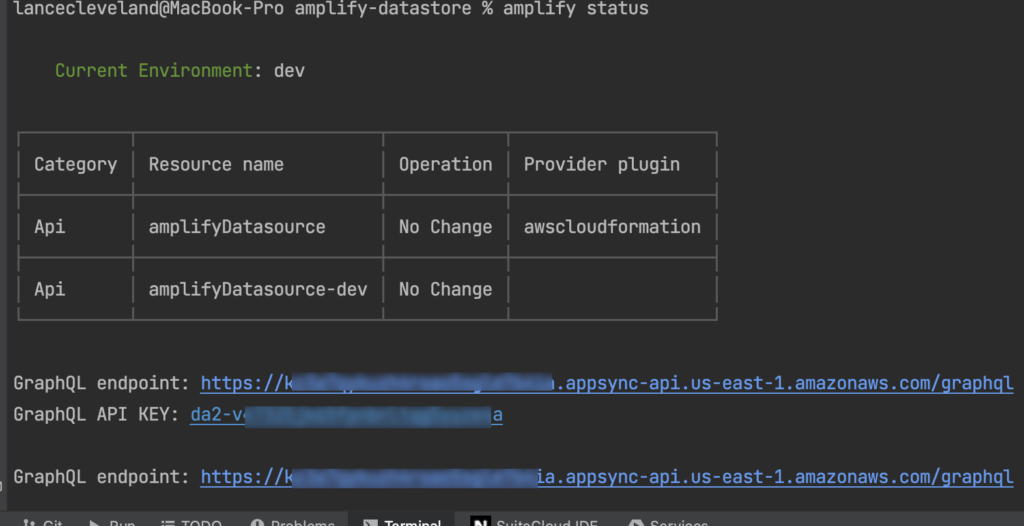
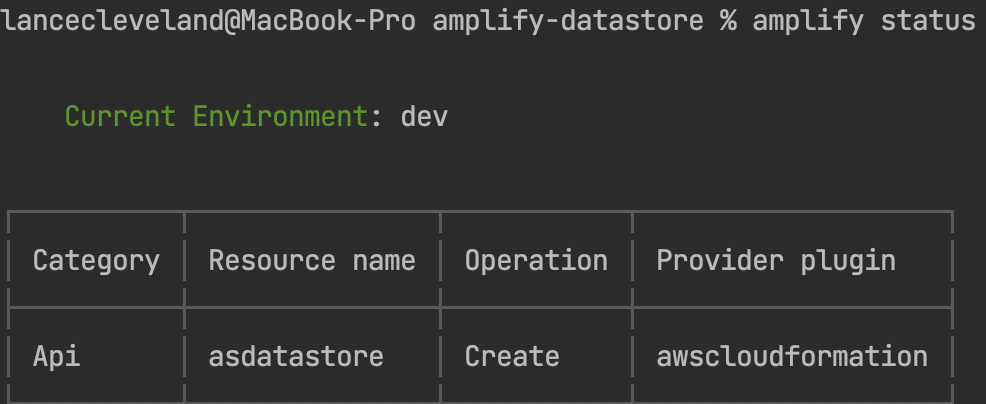
Let’s check out our amplify environment
amplify statusWell, damn, this isn’t right…
Patch Attempt 3
amplify delete
amplify init
npx amplify-app@latest
npm run amplify-modelgen
This tossed an interesting warning…
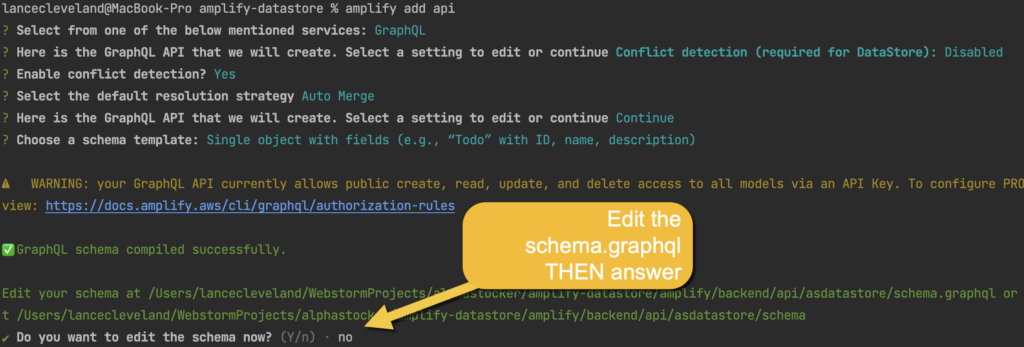
No AppSync API configured. Please add an APIGo try to add that back in…
amplify add apiAnswer the prompts and learn the data struct definition is missing.
Go back and edit amplify-datastore/amplify/backend/api/asdatastore/schema.graphql and add the model back in (copied from above) for the Messages model. It now looks a little different with the new default headers:
# This "input" configures a global authorization rule to enable public access to
# all models in this schema. Learn more about authorization rules here: https://docs.amplify.aws/cli/graphql/authorization-rules
input AMPLIFY { globalAuthRule: AuthRule = { allow: public } } # FOR TESTING ONLY!

type Message @model {
    id: ID!
    title: String!
    color: String
    createdAt: String
}
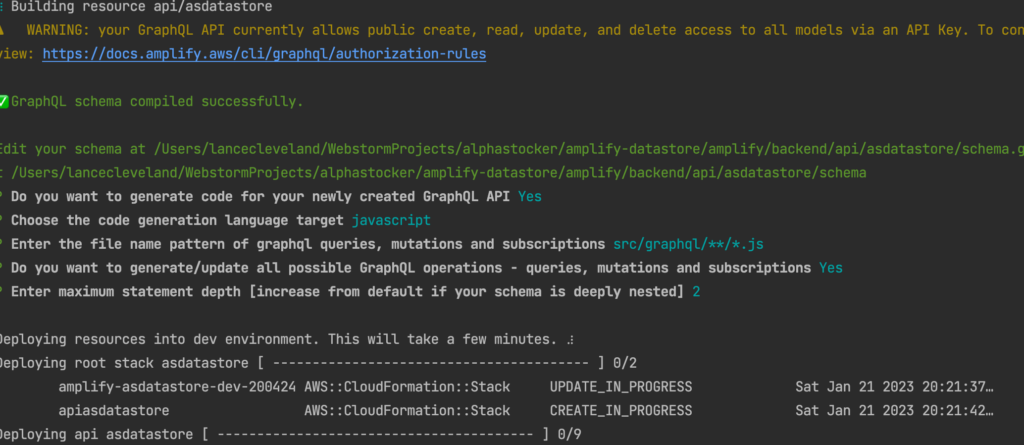
Answers to the amplify push command:
Woot Woot! Now for an article on doing this from scratch and getting it working on the first go! I’ll post that later.
Related Resources
This post is based heavily on the Amplify Getting Started documentation.
- amplify <category> <subcommand>
- amplify push
- amplify pull
- amplify env <subcommand>
- amplify configure
- amplify console
- amplify delete
- amplify help
- amplify init
- amplify publish
- amplify run
- amplify status
- amplify logout
Engage
Have tips on how to do this more effectively? Share in the comments below.